 |
| From there I usually eyeball the size from the paper. |
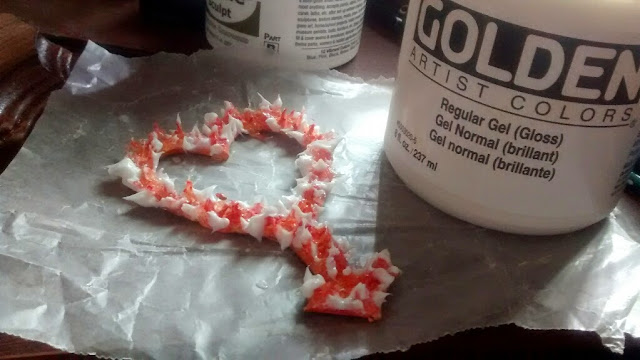
Starts of white goo color then dries clear and followed this guide to paint flames. It didn't sound hard but painting flames is hard to do.
I ended up painting it like the guide
then layering more Gel on it.
Since the gel dries clear I paint the tips red which makes is look "real-er" than my previous Ideas.
Which was to paint the whole thing but that made it look more like Pizza or Ketchup and Mustard having a HUGE fight instead of being "fire" :/ Thats never a good look!!!
Which was to paint the whole thing but that made it look more like Pizza or Ketchup and Mustard having a HUGE fight instead of being "fire" :/ Thats never a good look!!!

 |
| Notice the areas of sharpie just tint the "flames" neat right? |
Take a toothpick and wad it
with the gel from there glop it.
Then pull the glop
upwards to make "Flames".
It takes a few hours to dry.
So far you can notice the Tips are dried nice and clear but
still cloudy at the base.
Yep. More waiting I hate waiting!!!
Now about 6 hours later its all dried.
To me looked flat for me til I remembered I had colored Sharpie.
The colored variety always dry semi clear so it goes great for this project! I used Yellow,light orange and Dark Red.
And don't over do it fire still has clear areas :P
 |
| Scrapbook Gems w/ Sticky Backing! |
 |
| Example of the Gems on Sailor Mars |
The tiara I used Golden Reg. Gel for the Gem look (Shh!)
Now I just need Star Confetti for the star earrings and I will be
DONE! c:
No comments:
Post a Comment